
Creating a Windows 11 bootable USB drive is one of the easiest ways to install or reinstall Windows on a PC. Whether you’re upgrading, fixing a broken system, or setting up a new machine, Rufus makes the process simple and fast.
In this guide, I’ll show how to create a Windows 11 bootable drive using Rufus.
What You Need
Before starting, make sure you have:
- A USB flash drive (at least 8GB)
- A Windows PC
- A stable internet connection for downloading Windows 11 ISO file
- Rufus software
We use Rufus because it’s Free, lighweight, and more reliable.
Step 1: Download Windows 11 ISO
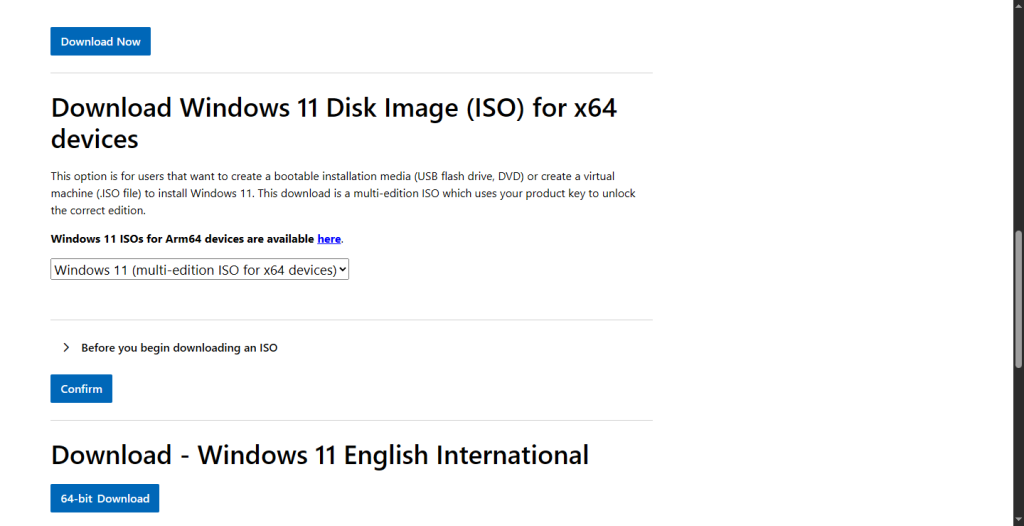
Go to the official Windows 11 download page
Download the Windows 11 ISO file () and save it to your computer.
NB: Microsoft now includes Home and Pro editions in one file. The one that’ll be installed depends on your license
Step 2: Download Rufus
Visit the official Rufus website
Download the latest version (no installation needed).
Step 3: Insert Your USB Drive
Plug your USB flash drive into your computer. NB: All data on the USB drive will be erased.
Step 4: Open Rufus
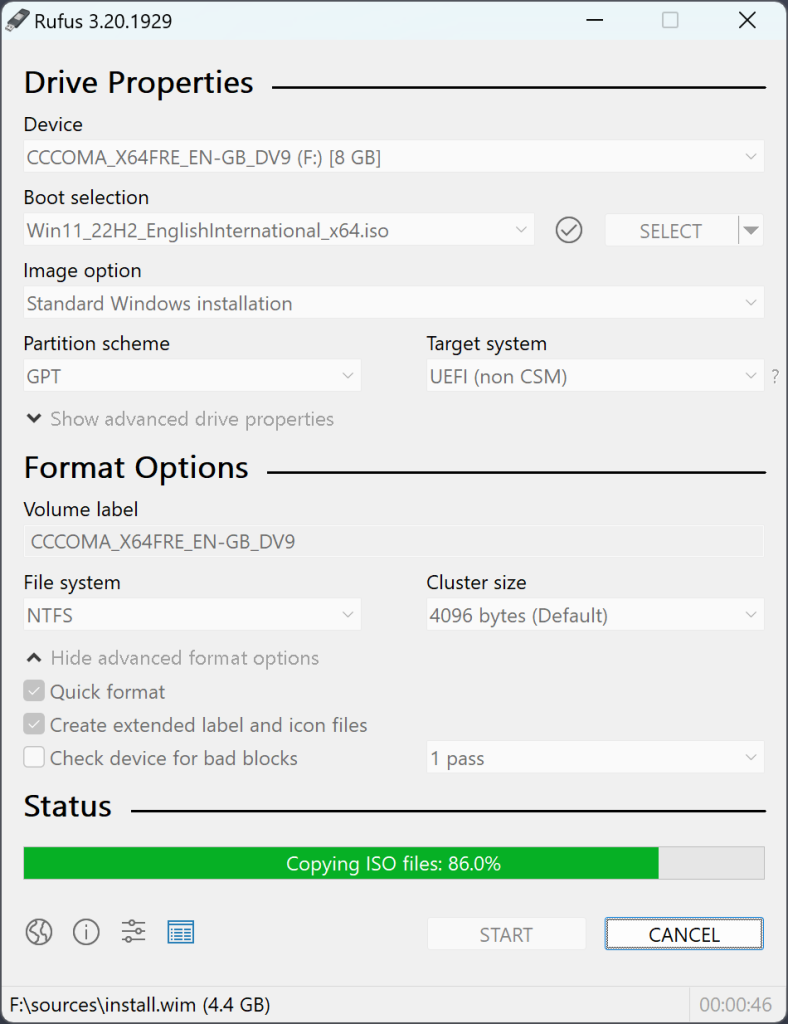
- Launch Rufus.
- Under Device, select your USB drive.
- Under Boot selection, click SELECT and choose the Windows 11 ISO file you downloaded.
Rufus will automatically configure most settings.
Got a Gadget You’re Selling
List on Zimbabwe’s marketplace for Used Gadgets
Step 5: Configure Partition Scheme
You’ll see options like:
- Partition scheme:
- GPT (for modern UEFI systems — recommended)
- MBR (for older BIOS systems)
If your PC supports UEFI (most modern PCs do), select GPT + UEFI (Non-CSM)
Rufus usually auto-detects the best option.
Step 6: Start the Process
- Click Start.
- Rufus may ask about Windows 11 requirements (TPM, Secure Boot, RAM).
One powerful feature of Rufus is that it allows you to:
- Remove TPM requirement
- Remove Secure Boot requirement
- Remove Microsoft account requirement (optional)
Choose the options you need, then click OK.
Wait for the process to complete. Speed depends on your PC specs
When it says READY, your bootable USB is done.
Step 7: Boot From the USB
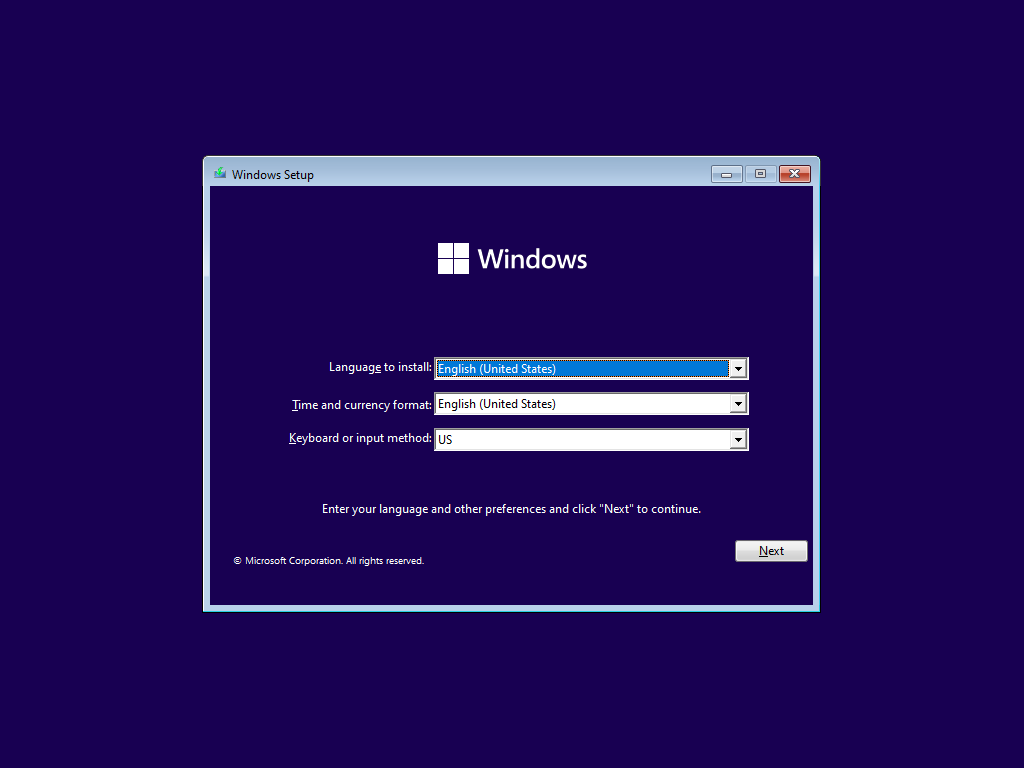
To install Windows 11:
- Insert the USB into the target PC.
- Restart the computer.
- Enter Boot Menu (usually F12, F9, Esc, or F2 depending on manufacturer).
- Select the USB drive.
- Follow the Windows installation instructions.
Common Issues and Fixes
USB not detected
- Reinsert the USB
- Try another USB port
- Format the drive first
Installation says PC doesn’t meet requirements
- Use Rufus’ option to disable TPM/Secure Boot checks
Boot option not showing
- Enable USB boot in BIOS
- Disable Secure Boot (if necessary)
Conclusion
Creating a Windows 11 bootable drive with Rufus is straightforward and takes only a few minutes. Once you have the USB ready, you can install Windows anytime without needing internet access.
NB: This article was AI assisted
Comments